
Cooking Merit Badge Health & Safety
[text-box width=”100%” align=”center”]
[unordered title=”Areas of Study:”] [line]Health and Safety[/line] [line]Nutrition[/line] [line]Cooking Basics[/line] [line]Cooking at Home[/line] [line]Camp Cooking[/line] [line]Trail and Backpacking meals[/line] [line]Food related careers[/line] [/unordered] [/text-box] [div-line] [text-box]
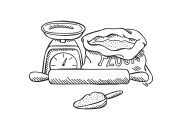
Tools and Equipment
Chefs take knife kits almost always. They keep them close by. These knife kits have everything they need in case they are called to work on a project. Knife kits don’t just have sharp knives, but there is a small cutting board, can opener, zip-lock bag(s), trash bag or two, vegetable peeler, whisk, spatulas, wooden spoons, tongs, and other most used equipment like a set of oven/stove protection.
When it comes to camping, be sure to include items such as dutch ovens, gas stove, single burner stove for backpacking, cooking pot, sporks, plates, napkins, bags for trash, and dehydrated foods.
When backpacking overnight consider the weight of food and gear. For overnight canned goods, frozen meats, and fresh fruits and vegetables are possible options even though they are heavy. The trade off is the nutritional value.
Durable foods include dehydrated and dried foods, tough-crust breads such as bagels, hard cheeses and salami, and vegetable oils sealed in containers will work well and resist spoilage. Trail life is challenging and difficult to have multi-course meals. Usually one pot meals are the best consideration while hitting the trail.
The main things people look for are nutritional value, taste and variety when planning a meal. When backpacking select balanced nutritional foods.
Also when backpacking, consider the time it takes to warm up food. Generally, there is a limited supply of fuel and water.
The main favorite is a chili for chilly evenings.
Gear recommended for troop or crew’s group trail cooking are:
[unordered]
[line]Backpacking stove with windscreen and adequate fuel for the trip[/line]
[line]Small maintenance kit, appropriate for the stove[/line]
[line]lightweight cook pot with stowable handle[/line]
[line]Cook pot lid that can double as a frying pan[/line]
[line]short wooden or plastic stirring/serving spook or ladle[/line]
[line]short plastic spatula-if foods require frying[/line]
[line]Liquid measuring device-many water bottles have measurement scales[/line]
[line]Ignition device – lighter and waterproof backup ignition source[/line]
[line]Small container of hand sanitizer[/line]
[line]small container of biodegradable detergent[/line]
[line]small scrub pad and camp cloth[/line]
[line]mesh bags for storing and airing food kit items[/line]
[/unordered]
In addition, each member of the group should carry their own personal mess gear, including:
[unordered]
[line]small, durable serving plate[/line]
[line]durable, heat-proof drinking cup[/line]
[line]lightweight spork, or fork, spoon and knife (utensil combo)[/line]
[line]Filled water bottles for cooking[/line]
[line]Mesh bag for storing personal food kit items[/line]
[/unordered]
Keep in mind water filtration systems that will work for your trip. Having potable water is one of the best things when you need it.
Today on the market, the camper has many choices available that were not available in the past, items such as: bulk nuts, dried fruits, trail mixes already to go, jerkies, drink powder in individual pouches ready to go, dried milk powders, and single sized snack items.
There are also snack bags for the things you make yourself or take with you. Additionally, there are systems that seal bags for meats, beans, vegetables and fruits. The dehydrator is a fantastic thing to invest in if you go camping often. If not, use a 200 degree F oven and dehydrate your favorite items on a sheet pan with a silmat.
A nutritional suggestion while at home is to take a can of chickpeas, drain them, place them on a sheet pan that is lined with a silmat or sprayed. Then place in the 250 degree F oven for 2 hours. Pull them out and season them, allow to cool. Then package them up and you have a nutritionally dense snack ready to package.
When backpacking store foods away from the upper and rear surfaces of the backpack, deeper in the center of the pack, to reduce the temperature to extend the shelf life.
When backpacking on the trail, do not:
[unordered]
[line]bring raw meat or eggs unless they are to be cooked and consumed soon after starting the trek[/line]
[line]consider cold and wet weather and altitude that lengthen cooking time[/line]
[line]higher altitude means lower boiling temperature[/line]
[line]use cheap ziplock bags, use high quality ziplock bags and containers; they seal to keep moisture out[/line]
[line]cook in a sleeping tent; its just too dangerous[/line]
[line]forget to clean your trays and utensils – get rid of any smelly odors[/line]
[line]risk getting food poisoning – its not worth it![/line]
[/unordered]
Did you know that you can dry salsa and spaghetti sauce through a dehydrator at 125 degrees F? On the trail just add water and you are set to go! Dried sauces will fully re-hydrate on the train even when using cold water! What can you plan on drying that is nutritious and interesting for the troop?
[/text-box] [div-line]