[h1]Baking Mistakes[/h1]
Most of us start our children out baking. Since all of the food tasks can be done ahead of time while kids have their focus.
Baking is lots of fun, but most parents never go beyond cakes, cookies and brownies with their kids. This subject will be an article for another day. This article is for fun!
Baking is not nearly as forgiving as cooking. In cooking we add “pinch” and “dash” of all kinds but nothing to ruin a recipe. Baking is more precise. Method, technique, timing is everything. Home cooks and professionals alike can make the most wonderful baked items for anytime of year.
When working with kids and families, I’ve found the most common baking mistakes are these:
[text-box width=”100%” align=”left”] [h2]1. Pans not being prepared properly[/h2]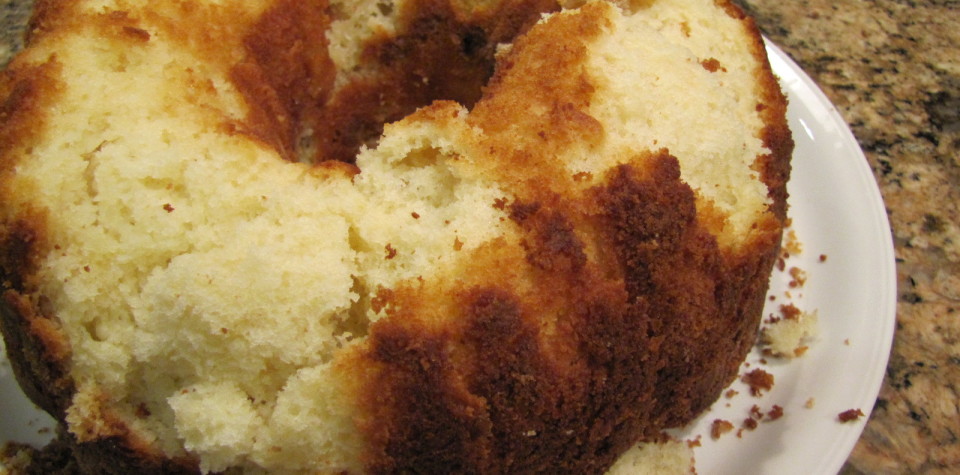
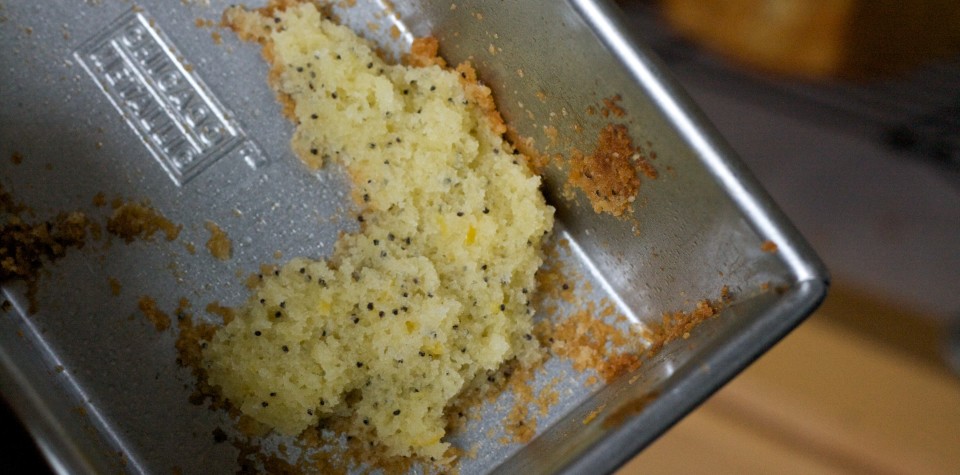
It is a crushing feeling when you take a beautiful cooked cake out of the oven only to find half of it stuck to the pan as you turn it out. Ouch! You may have made it to the end of the cooking process, now what?
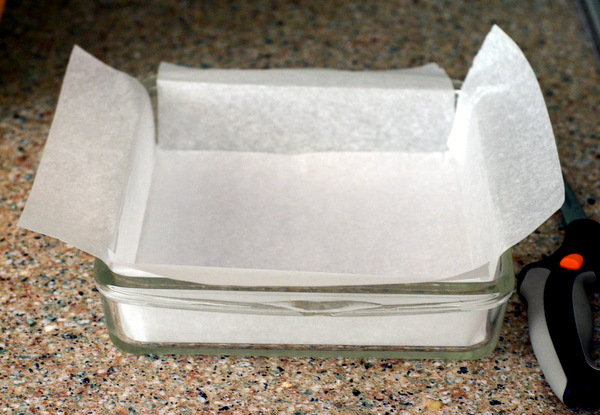
[ordered title=”Baked goods come out neat and clean when time is taken to properly prepare the pans.”] [line]Start by greasing the bottom and sides with non-stick cooking spray[/line] [line]Line the pan by placing a layer of parchment paper on the bottom and sides[/line] [line]Spray or use butter and a silicon brush or your hand to lightly coat the top of the parchment paper.[/line] [line]Top sprayed or buttered layer of parchment paper with flour (be generous so that the flour will stick
to the butter everywhere). Shaking the pan is fine.[/line] [line]Then remove the excess flour that won’t stick to the spray/butter- they call this “tapping out the
excess”. Without banging or smacking equipment around the kitchen – tap extra flour into a bowl so it
is used in the recipe.[/line] [/ordered]
[/text-box] [text-box title=”” width=”100%” align=”left”] [h2]2. Ingredients not brought to room temperature[/h2] Common baking ingredients such as butter, eggs and milk are most successfully combined into a recipe when used at room temperature.
Take these ingredients out of the refrigerator an hour before using them.
[h3]An online suggestion that I found said “But on the chance that you forget?”[/h3] [unordered title=””] [line]Grate cold butter on the large-hole side of a box grater. It will be ready to go in minutes.[/line] [line]Eggs, place in a bowl of warm water for about 10 minutes.[/line] [line]Use the microwave for milk except for about 20 seconds.[/line] [/unordered] [/text-box] [text-box title=”” width=”100%” align=”left”] [h2]3. Not reading the recipe carefully[/h2]Reading through a new recipe a few times will help you prepare your ingredients, utensils and steps.
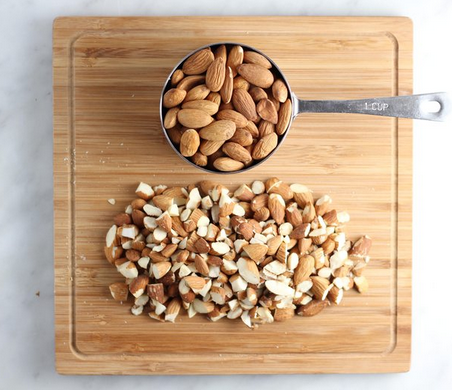
For example, “one cup of almonds, chopped” looks like this:
Whereas “one cup of chopped almonds” looks like this:
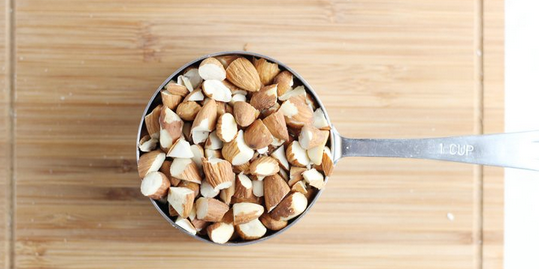
In the first example, you measure one cup of almonds and then chop. In the second, you chop enough almonds to measure one cup.
Reading through the recipe will also alert you to ingredients that need to be melted and then cooled completely before proceeding, or batters that need to rest/chill/freeze overnight.
[/text-box]
[text-box title=”” width=”100%” align=”left”]
[h2]4. Not measuring your ingredients properly.[/h2]
Precise measuring is key to successful baking. A great way to ruin a recipe when baking is not using the proper tools based on your ingredients.
Avoid these baking mistakes by using proper equipment and using them correctly.
[ordered]
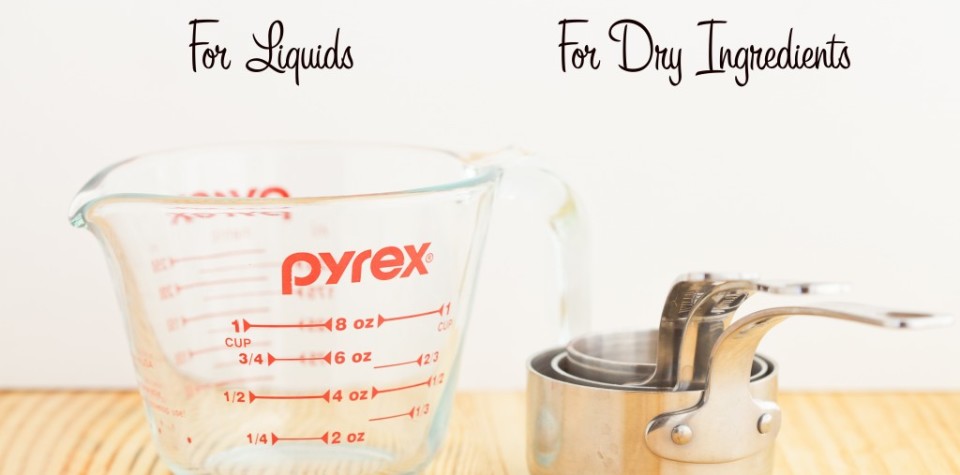
[line]Liquid ingredients should be measured in a spouted measuring cup. Hold the cup at eye level and pour in your liquid as instructed.[/line]
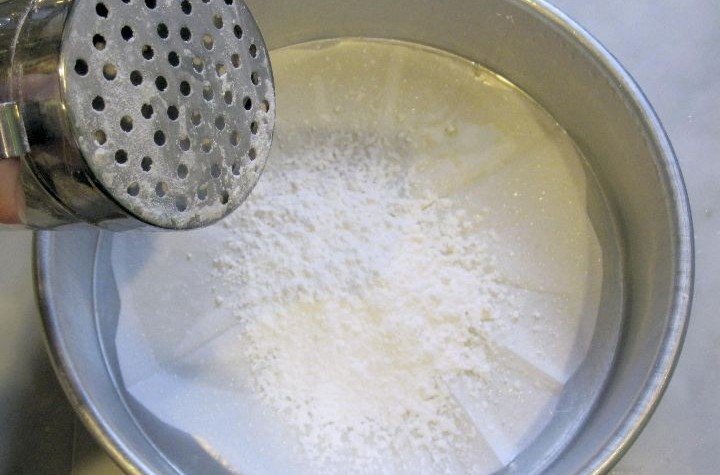
[line]Dry ingredients use standard measuring cups. Place on a piece of waxed paper and lightly spoon in your ingredient to overflowing. Level off with a knife without tamping down or packing, and pour any excess back into the original container.[/line]
[/ordered]
[unordered]
[line]The exception would be brown sugar and peanut butter (or other spread) that usually is measured. This ingredient would be measured as being “packed”.[/line]
[line]A kitchen scale should be handy when recipes call for measuring by weight instead of volume.[/line]
[/unordered]
[/text-box]
[text-box title=”” width=”100%” align=”left”]
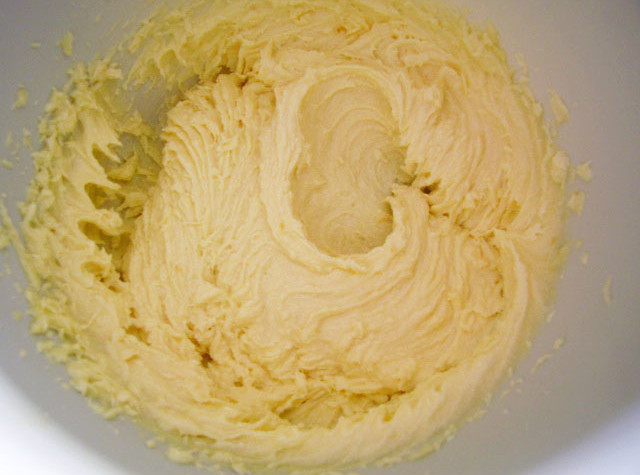
[h2]5. Not creaming the butter and sugar long enough[/h2]
You’ll notice that most recipes start out by creaming butter and sugar. The first step is making sure the butter is at room temperature (see tip No. 2!). The second is thoroughly beating the butter and sugar—you want a light and fluffy mixture, which will not only better absorb the remaining ingredients, but result in light and tender cakes and cookies.

Substituting ingredients in cooking will rarely result in disaster. Not so much when it comes to baking:
[ordered][line]Salted versus unsalted butter[/line][line]All-purpose versus self-rising flour[/line][line]Baking powder versus baking soda[/line][line]Cream versus skim milk[/line]…just a few examples.
[/ordered]
Avoid these baking mistakes by having the proper ingredients on-hand before you start baking.
[/text-box]
[text-box title=”” width=”100%” align=”left”]
[h2]7. Ingredient errors – Not using the correct amounts and skipping ingredients[/h2]
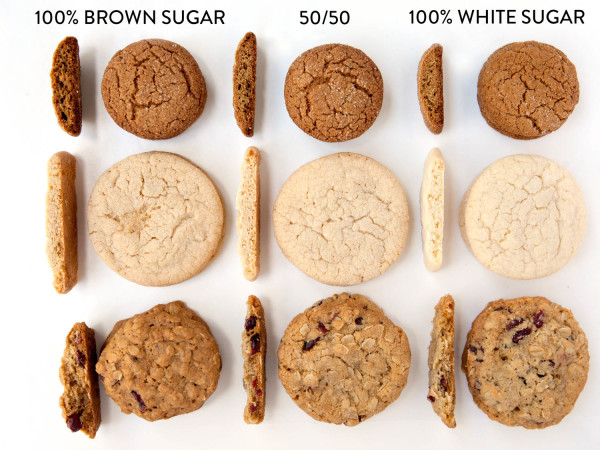
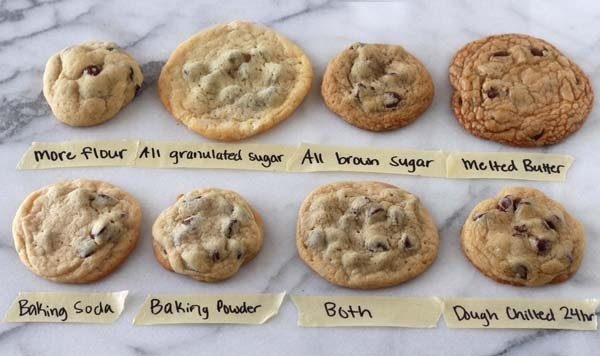
Baking great recipes is a science. It takes attention to detail and technique. Whenever possible, take time to play and learn basic food science as part of your developing food literacy. This includes experimenting with recipes by exploring and discovering the purpose of different baking ingredients. Explore different times and temperatures, different kinds of flour, different types of sugar, even different chocolates.
[/text-box]
[text-box title=”” width=”100%” align=”left”]
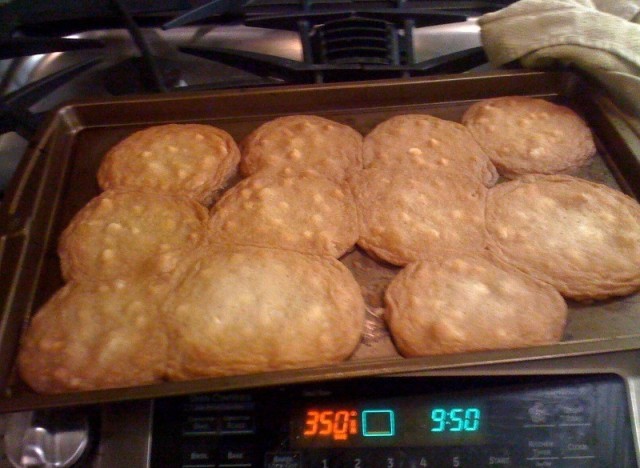
[h2]8. Crowding the baking sheet or pan[/h2]
Follow the recipe’s instructions for spacing cookies and other piece items on the baking sheet. Some items spread quite a bit once they hit the oven. Avoid the baking mistakes that bring disappointment through a glob or mass that has been stuck together.
Again, by exploring and discovering through experimentation, you will figure out the space requirements of your recipe. Test by placing 2 or 3 pieces of what you are making on a baking sheet and bake. Then see how much space you need.
Many recipes specify placing multiple baking sheets in the oven, instructing you to switch positions halfway through the cooking process. For some this doesn’t work.
[unordered]
[line]It requires opening the oven door too soon, see next baking mistake![/line]
[line]Baked items just don’t bake up or color properly.[/line]
[/unordered]
Avoid these baking mistakes by baking one sheet at a time. It is true that it takes longer, but perfect consistent results are sometimes well worth the wait.
[/text-box]
[text-box title=”” width=”100%” align=”left”]
[h2]10. Opening the oven door.[/h2]
Avoid this baking mistake by using the light in your oven to see inside instead of opening the door. While it can be very tempting to peek in on your creation while it’s baking away in the oven. Resist the temptation to open the door until the baking is done, or when a recipe requires a shift of items inside. Opening the oven door too soon causes a sudden change in temperature, resulting in baked items not rising or even browning properly. One average I heard is that an opened oven looses 20 degrees F each second it is opened.
[unordered]
[line]Keep that door closed for at least 3/4 of the cooking time.[/line]
[line]Resist the temptation to peek before the cooking is done.[/line]
[line]Resist opening the oven door when in a hurry.[/line]
[/unordered]
[/text-box]
[text-box title=”” width=”100%” align=”left”]
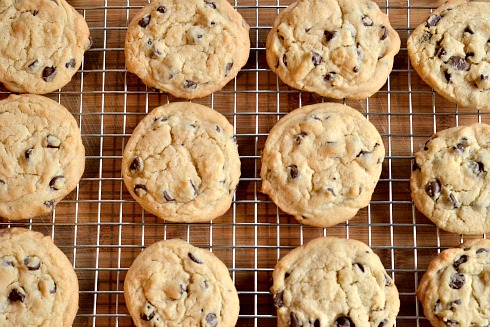
[h2]11. Not using a cooling rack[/h2]
A cooling rack is as important for almost anything we bake.
[/text-box] Inspired by my experience and online research. Baking mistakes happen. Allow mistakes when you are testing and learning. Get the whole family involved and it will be fun.
